Manage a Campaign
A mailout is associated with a single Survey. You can add and manage multiple mailouts for each survey. Mailouts use emails, refer to Emails: Unsubscribe, Subscribe, Opt in for details on how subscriptions and opting in are managed.
Create
Select the Project and then the Survey that you are going to send. Then select the Campaigns menu and Add.
Enter a name for the campaign
Enter a "Subject" to be included with each email sent
Enter the "content" of the email
Optionally select the checkbox to allow multiple submissions from each email
Layout your email content as you want it to appear to the recipient using multiple lines. The following special terms can be used:
${name} - This will be replaced by the name of the email recipient in the email
${url} - This will be replaced by the link to the survey in the email. If you do not include ${url} in the email content then the link to the survey will be added after the content text.
Example:
Dear ${name},

We are conducting a survey on attendee experiences at the recent festival.
Are you able to complete the following short survey? ${url}.

thanks

Karen
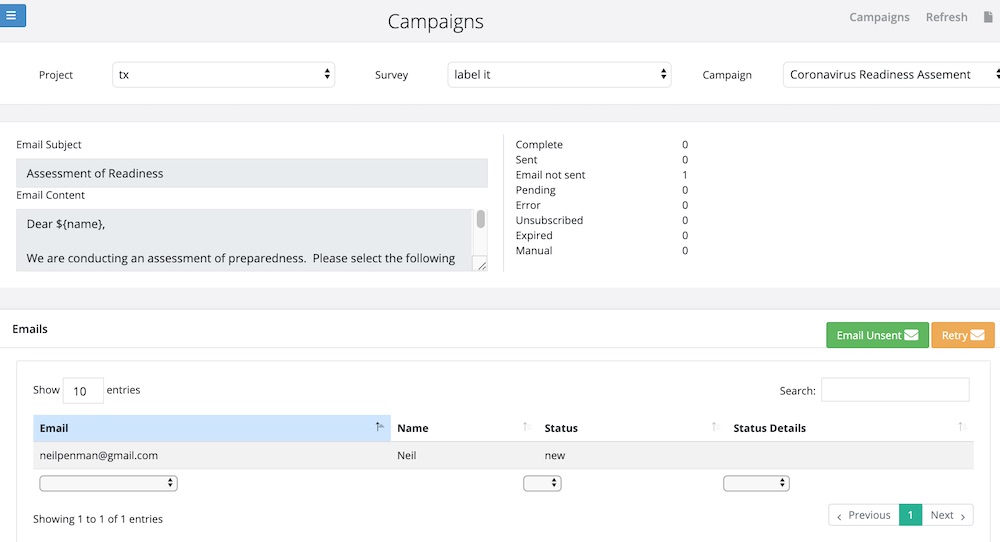
The campaign page
Note
For most campaigns you would not select "multiple submissions". Usually the objective would be to get a person to fill in a form once. However you may want to create links that can open a form that can be completed any time. Covid check in forms are a good example of this.
Adding Email Recipients
Email recipients are added from a spreadsheet. To get the spreadsheet format you can select the menu File and then Export Emails XLS. If you have not already added email recipients this exported file will only have a header row.
Add details on each email recipient to the mailouts worksheet in the spreadsheet
email. Their email address
name. Their name
Warning
The name is only used if a new contact is created. If the contact already exists you can edit their name on the Contacts page
The columns status and status_details are ignored. They are only used when exporting the emails.
All other columns are interpreted as the names of questions in the top level form and will be used to set the initial value of that question.
When the spreadsheet is ready upload by select the menu File and then Import Emails XLS.
Note
Only emails that are not already in the campaign will be added. If you select the checkbox "Clear existing unsent emails" then email addresses that have not already been sent will be removed.
Modifying Email Recipients
Once emails have been sent the email recipient cannot be changed or deleted. However when importing the emails a checkbox is provided to "Clear existing Unsent Emails". If this is selected then the unsent emails will be replaced with the emails in the spreadsheet. This way you can manage your list of email recipients in the spreadsheet up until the point you send the emails.
After you have sent emails then you can still add new emails to your mailout by importing from the spreadsheet. Emails addresses that have already been sent a survey will be ignored.
Sending Emails
Press the button "Email Unsent" to send all of your emails.
Alternatively if you have already sent emails and some of them failed, perhaps because the user was unsubscribed, then you can press the "Retry" button. This will send all unsent emails and will also try and send those with an unsubscribed or error status.
Getting the survey links
You may want to a link to a survey using your own email server or perhaps in an SMS message. However these links are normally only generated when the "Email Unsent" button is pressed. To immediately generate the links press the "Generate Links" button.
Warning
Single submission links will expire after 30 days so you should only generate them when you are ready to collect data.
Once the links have been generated you can view them by editing an individual mailout or by exporting all the mailouts to a spreadsheet.
Completing a Mailout Survey
The recipient can click on the link to open the survey. Alternatively they can:
Ignore the email
Select the unsubscribe link after which they will not be sent any more emails
If this is the first time they have been included in a mailout they will first get an optin email message. If they ignore this or select unsubscribe then they will not receive the mailout or any other email messages
Once the survey is successfully submitted the user will be shown the following confirmation message. If they click on the link again they will see the same message as each mailout survey can only be completed once.
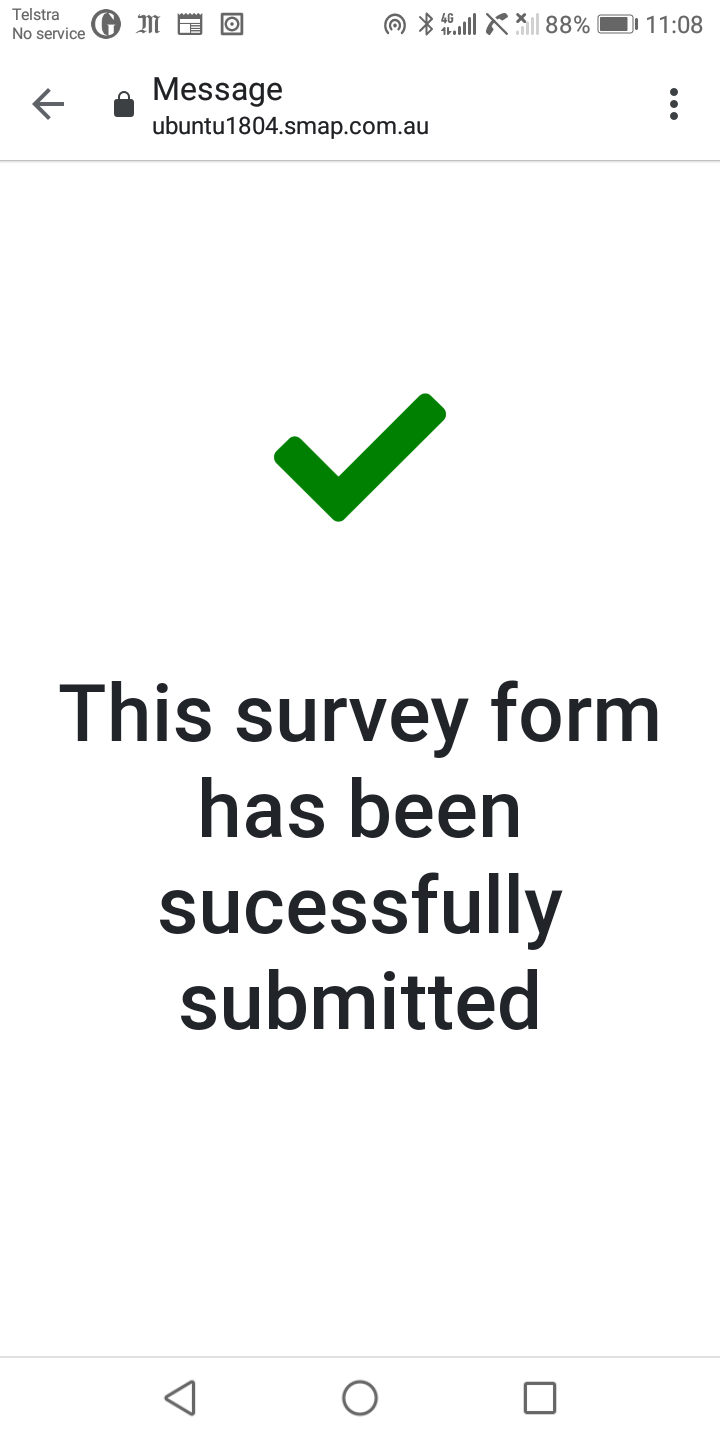
Completion Page
Adding initial Data
Each survey sent can be personalised to the recipient by using initial data. You can do this by adding extra columns to the spreadsheet that has your list of recipients. Each column name should correspond to the name of the question that you want to pre-populate.
In the following simple example a single question is prepopulated with the currently understood address of the recipient.

"address" might be a text question in which case when the user completes the survey they will see that address as the default answer for the question. Alternatively you can pre-populate calculation questions and use these to control the logic of how the survey is completed using relevance.
You can add as many columns as you want in order to pre-populate as many questions as required. However the following column names are reserved. So if you have one of these as a question name you won't be able to pre-populate it:
email
name
status
status_details
Viewing details of an email mailout
If you select an email in the table then you can press the Details button. This will show the URL of the link that the user selects to complete the survey. You can then copy this URL and send it to the recipient by other means if they are having trouble accessing it.
The details popup will also show the initial data to be applied to the survey in JSON format.
Exporting emails in the campaign
All email, their status for the campaign and the survey link for each email can be exported to a spreadsheet. Select the menu File and then Export Emails XLS